
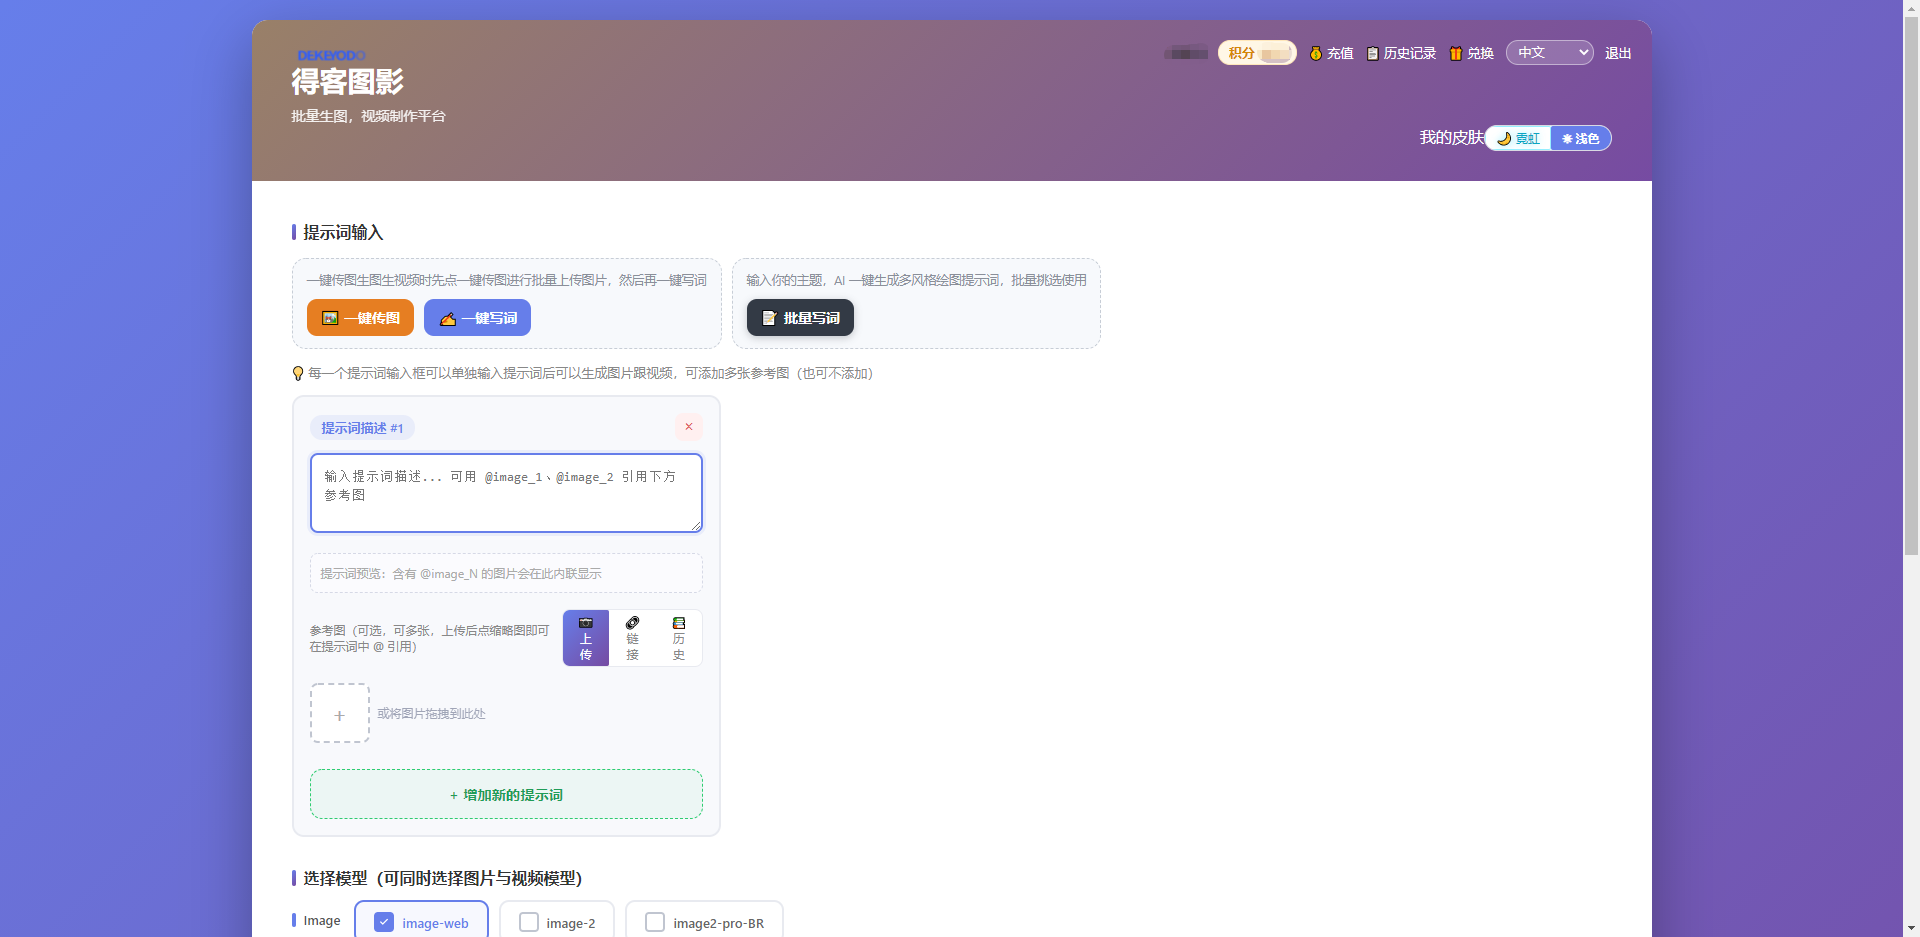
Overview of the DKS Image Workflow
① Enter prompt → ② Upload reference image (optional) → ③ Select models (images and videos can be checked simultaneously) → ④ Set image ratio and generation quantity → ⑤ Start batch generation
Step 1: Enter Prompt
Method 1: Write it yourself (suitable for users with specific ideas). Type directly into the input box of "Prompt Module #1."
Method 2: Batch write (black button): Enter a simple theme on the right, for example, "thermos cup sales," and AI will automatically generate multiple batch prompts for you to choose from;
💡 There are also two functions:
One-click image upload: Select multiple images, and the system will automatically create a new task for each image, using that image as the reference image for the task.
One-click write: After entering, click "Input into all tasks" to apply the unified prompt to all current task cards; leave blank to clear all task prompts.
Step 2: Upload Reference Image (Optional)
Location: The "Reference Image" area below the prompt module.
Multiple uploads are supported. Click "Upload" to select local images, or choose previously used images from "Gallery / History";
After uploading, use @image_1 (first image), @image_2 (second image) in the prompt to specify which image to reference.
Step 3: Select Models (Images and videos can be checked simultaneously)
Image models: Such as image-2, image2-pro-8R, etc.; check to generate images;
Video models: Such as veo, minimaxH3, Grok, muse-video, omni, etc.; the numbers in parentheses represent video duration and resolution (e.g., 5S-720P = 5 seconds, 720P); check to generate videos;
💡 You can check multiple models at the same time; the system will generate a batch of results for each selected model for easy comparison and selection.
Step 4: Set Image Ratio and Generation Quantity
Image ratio: Click to select the desired aspect ratio. (Product main image/avatar: select 1:1; Vertical short video cover/mobile wallpaper: select 9:16; Horizontal cover (e.g., Bilibili banner): select 16:9)
Generation quantity: Drag the slider to adjust; the default is 3 images per model. The more you generate, the more options you have, but the more computing power is consumed.
Step 5: Start Batch Generation
Check the computing power prompt in yellow text at the bottom: "Computing power consumed: xx (Current account: XXX)" to confirm sufficient computing power;
Click the purple "Start Batch Generation" button;
Wait for generation to complete, then go to "History" to view and download.